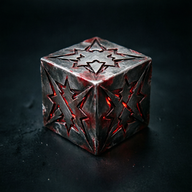
Clive Barker's Hellraiser Revival Hunt Marlowe Walkthrough
Follow our Clive Barker's Hellraiser Revival Hunt Marlowe walkthrough for keypad codes, bell puzzles, hidden upgrades, and the final boss. Finish the hunt.
Jump to
Start Hunt Marlowe: Snake Key and Voyeur Room
Marlowe’s trail takes you through locked rooms, lethal machinery, and another encounter with Bruno. This Clive Barker's Hellraiser Revival Hunt Marlowe walkthrough keeps the key items and puzzles in order so you can reach him without leaving permanent upgrades behind. Follow the Clive Barker's Hellraiser Revival Hunt Marlowe walkthrough from your current objective: the game reuses “Hunt Marlowe” across several stretches, with the Sister of Mercy fight between them.
Check the Objectives menu to identify your current task. There is no Chapter Select, and leaving an area can permanently cut off its collectibles. Maps in these sections can display missing rooms or incorrect positions, so use doors, ladders, and room features to navigate.
At Zora’s third shop, the Assault Rifle costs 450 coins. Pick it up for the later armor-piercing upgrade and Trickshot opportunity. You can store it until needed. The .357 ammunition recipe costs 180 coins and uses two Scraps, four Gunpowder, and one Chemicals.
Keep these keypad combinations handy for the Clive Barker's Hellraiser Revival Hunt Marlowe walkthrough:
| Code | Location | Reward or purpose |
|---|---|---|
| 1952 | Around the corner from the Voyeur Ticket | SMG Laser Pointer |
| 1923 | Room immediately right after the Embossed Block door | Revolver Hollowpoint Rounds |
| 1362 | Dead end south of the fourth shop | Rifle upgrade and inventory expansion |
| 8571 | Cabinet in the room revealed after the moving trap passes | Opens the supply cabinet |
| 2342 | Room containing the later ladder | Opens the supply cabinet |
Find the Snake Key inside a cabinet in a room east of the large central rooms. Return toward the entrance and unlock the door decorated with snakes.
Inside, take the Voyeur Ticket from the table immediately right. Open the nearby cabinet with 1952, then bring the ticket to the machine beside the red, star-covered door on the eastern side.
Continue through the encounter with the multi-arm miniboss. Collect the Peephole Inset at the bottom of the ladder leading back toward the shop, then insert it into the gold-and-red door.
For its diamond puzzle, leave the innermost ring untouched initially and work from the inner movable rings outward: turning a ring also rotates those outside it. Align the diamonds with each other, then rotate the matched arrangement into alignment with the outer border.
Official page: Clive Barker's Hellraiser Revival (hellraisergame.com)
Recover the Genesis Configuration and Unlock Hellchains
The next stretch of this Clive Barker's Hellraiser Revival Hunt Marlowe walkthrough starts with the Sister of Mercy separating you from the box. Your immediate goal is to sneak past her and reach the opening high in the room.
Before climbing, circle around the lower area’s left side. An Inventory Capacity Upgrade is attached to the back of a chair holding a body at the dead end.
Throw bottles across the room to draw the Sister of Mercy away from your route. Climb the stairs and pass through the hole where the Genesis Configuration was thrown. This escape earns So Much for the Cat and Mouse Shtick.
Follow the Labyrinth route to recover the box. Watch the wall blades and run through their paths before they extend. Before leaving, collect both upgrade pillars:
| Artifact | Landmark | How to reach it |
|---|---|---|
| Suffering Pillar #4 | Rotating octagonal path sections | Rotate the second and third sections to reach the pillar on the third |
| Pain Pillar #3 | Moving-staircase room after a ladder | Align the two cubes on the left with their neighboring platforms, use fire on the room’s pillar, and follow the opened route |
Continue down through the club into another Chatterer chase. Take passages where the Chatterer is absent. In the spinning-blade room, lower the block to create a crossing.
When you reach the hallway with paintings, enter the door and interact with the table items three times. That returns you to the chase.
Finishing this sequence unlocks Hellchains and the Unlimited Power! achievement. Damage the enemies in the following room to refill Suffering, then use Hellchains to hook and tear them apart.
For achievement cleanup, this encounter supports progress toward 69 Hellchains kills. Reloading the latest autosave lets you repeat the encounter. Keep that separate from your collectible progress so you know which pickups need collecting again after a reload.
Reach the Sister of Mercy and Claim Her Heart
With Hellchains unlocked, the Clive Barker's Hellraiser Revival Hunt Marlowe walkthrough returns to the upper floor. Enter the southwestern room and inspect the ear-shaped block. Remove its nails from front to back to obtain the Embossed Block.
Visit Zora before proceeding. The Assault Rifle AP Rounds upgrade costs 180 coins, and the 7.62 ammunition recipe costs 200 coins. That recipe requires four Scraps and four Gunpowder.
Equip AP Rounds if you want to attempt Trickshot during the upcoming rush of weak enemies. Complete your recipe collection here if you have purchased the earlier recipes; collecting every recipe earns Librarian, while crafting every craftable item earns Artificer.
The route forward follows this sequence:
| Item or upgrade | Where to look | Next action |
|---|---|---|
| Embossed Block | Ear-shaped block upstairs | Insert it into the northern door |
| Revolver Hollowpoint Rounds | Cabinet opened with 1923 | Collect before moving on |
| SMG Skeletonized Bolt Carrier | Suitcase behind the downstairs waterfall-room bar | Pick up before climbing onward |
| Hobby Horse | Northwestern room after the southwestern ladder and drop | Use on the keypad upstairs |
| Gagged Skull | Southern pedestal in the large open room | Place in the door left of Zora |
At the Embossed Block door, rotate the blocks to match the four paintings beside it.
After collecting the Hobby Horse and opening the door, zombified Cultists rush you. Line up two and fire the Assault Rifle with AP Rounds to attempt Trickshot, which requires two kills with one shot. If the initial pair survives, move into the bathroom ahead and turn toward the additional attackers.
Collect the Overloaded Cartridges rifle upgrade from the western pedestal after defeating the blob enemy. Return to the shop, then use the Gagged Skull to continue.
The Sister of Mercy primarily demands ranged attacks. Stop firing when she throws knives and dodge until the volley ends.
At roughly two-thirds and one-third health, the arena turns red. After about ten seconds, she advances to grab you. Hit her several times during that approach to knock her down, then use Hellchains when prompted.
After defeating her, collect Sister of Mercy’s Whip to sell. Enter the Labyrinth and activate Pain Pillar #4, directly along the main route.
Solve the Bells and Restore the Elevator
The next part of this Clive Barker's Hellraiser Revival Hunt Marlowe walkthrough crosses the Leviathan beam area. Save before attempting it: dying here returns you to the manual save point because this section has no checkpoint.
Near the front of the open area, absorb the central flame and launch it at the block on the right. Enter that side passage and raise the block to reveal Suffering Pillar #5. Retrieve the fire afterward and return it to the pillar that opens your exit.
At Zora’s fourth shop, finish outstanding purchases while you can still explore and gather materials. The final shop offers another buying opportunity, but it sits immediately before Marlowe.
| Pickup | Location or requirement |
|---|---|
| Lightweight Recoil Spring | Fourth shop, 150 coins |
| Heavy Lower Handguard | Room south of the shop, code 1362 |
| Inventory Capacity Upgrade | Beside the body in that same room |
| Heart-Shaped Inset | Fit the Genesis Configuration into the central pillar opposite the shop |
| Double Drum Mag | Table beyond the two spinning traps |
| Spirit Warding Bell | Front drawer of the music box after making it play |
Use the Heart-Shaped Inset on the door right of the shop. Beyond the Cultists, pass the spinning traps to collect the Double Drum Mag. Slide through a gap in the second trap, then step on the button to its right to stop them for the return trip.
Drop into the next area and inspect the music box. Rotate it to the back to make it play, then take the Spirit Warding Bell from its front drawer.
Bruno attacks again. Set him on fire and use close-range shotgun shots to deal damage. At half health, he retreats through a wall opening; follow him into the previous room.
Afterward, he takes the Genesis Configuration. Continue to the bells near the statue and add the missing bell. Arrange them in this order:
Marlow → Bruno → Mark → Genesis Configuration → Ascension
Continue past the moving trap and open the cabinet with 8571. At the painted door, flip the wall pieces until the picture is complete, then activate Pain Pillar #5 beyond it.
Find the Elevator Key on the southeastern table in the room with TVs along its western wall. Use it on the elevator in the pillar room and defeat the enemies that spawn.
Clear the Sewers and Defeat Marlowe
The final stretch of this Clive Barker's Hellraiser Revival Hunt Marlowe walkthrough begins after you recover the Genesis Configuration from Bruno. Pick up his mask to sell, then open the cabinet in the ladder room with 2342. A storage chest in the next area lets you free space and return for supplies.
In the large sewer chamber, advance toward the far exit to trigger the blob enemy blocking your route. Defeat it to continue. You do not need to kill every other enemy; lure pursuing zombies around the blocks with spinning blades underneath.
The room with two water pools requires the Lever:
- Switch off electricity to the southern pool.
- Turn over the bodies in that pool to find the Lever.
- Install it at the top of the stairs.
- Survive while the exit bridge extends.
Lead enemies through the water and activate its electricity to kill them. Only one pool’s switch can remain on at a time; activating one turns the other off.
After climbing through the trapdoor, use the final shop. Stock up on shotgun ammunition, with Revolver, SMG, or Assault Rifle rounds for Marlowe’s back targets. You can sell melee weapons here because the remaining boss strategy uses firearms and the Genesis Configuration.
| Boss phase | Target | Action |
|---|---|---|
| Opening | Three bodies on Marlowe’s back | Shoot them with the Revolver, SMG, or Assault Rifle |
| Stunned | Monster’s closed mouth | Use Hellchains to expose Marlowe |
| Exposed | Marlowe’s real body | Move close and fire the shotgun |
| Half health | New section of the arena | Repeat the back-target and exposure sequence |
| Finish | Marlowe himself | Approach and interact with the Genesis Configuration |
Destroying all three back targets creates your damage opening. Focus your shotgun fire on the exposed body, then repeat after the arena transition. The finishing interaction earns Go to Hell!.
Enter the Labyrinth passage in the boss arena to return to the apartment and give Marlowe’s heart to Sunny.
FAQ
Where does the Clive Barker's Hellraiser Revival Hunt Marlowe walkthrough begin?
Start at the third Zora shop, then collect the Snake Key east of the central rooms. Later stretches reuse the Hunt Marlowe objective after the Sister of Mercy sequence.
What is the correct bell puzzle order?
Place the Spirit Warding Bell, then arrange the bells as Marlow, Bruno, Mark, Genesis Configuration, Ascension.
How do you expose Marlowe’s weak point?
Destroy the three bodies on his back, then use Hellchains while he is stunned. Shoot his exposed real body with the shotgun.
Can you return for missed collectibles through Chapter Select?
No. There is no Chapter Select, and areas become inaccessible after you leave. Collect upgrades and activate pillars before advancing.
Continue with
Hellraiser Revival Open The Gate To Charlotte WalkthroughClive Barker's Hellraiser Revival Open the Gate to Charlotte walkthrough covers statue parts, the mansion safe, Bruno, and the well puzzle. Open the gate.More in Guide
Hellraiser Revival Escape The Cult Walkthrough Guide
Clive Barker's Hellraiser Revival Escape the Cult walkthrough covers Bruno, both keypad codes, the pistol, and the VIP route. Follow each step to escape.
Clive Barker's Hellraiser Revival Guide: Survive Hell
Use this Clive Barker's Hellraiser Revival guide to solve puzzles, conserve ammo, defeat bosses, and avoid missable trophies. Prepare for the Labyrinth.

Clive Barker's Hellraiser Revival How Long to Beat: Hours
Clive Barker's Hellraiser Revival how long to beat: plan for a 15-hour story, a run near 20 hours, or 30–35 hours for full completion. See what adds time.
Join the community
Official channels for news, updates and player help: